DIY Vintage Style Outdoor Lanterns Project That Will Give Your Evenings A Soft Glow
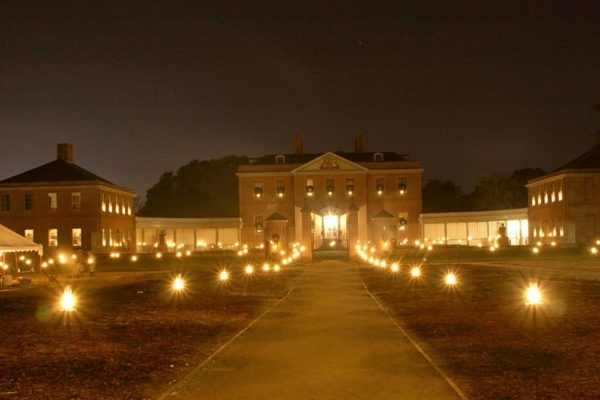
Today I am going to show you how to make your own DIY vintage style outdoor lanterns inspired by a local historical property that captured my heart. The photo below is a picture of Tryon Palace during it’s Christmas Candlelight Tour. The lawn is lined with vintage style lanterns staked into the ground. The effect is just beautiful and I fell in love with these vintage style outdoor lanterns immediately. Honestly, I fell in love with the entire experience. It was like taking a step back in time to a time and place I often fantasize about. (More on Tryon Palace later in this post.)
This is a closeup look at one of these vintage style outdoor lanterns. Nice. Right?
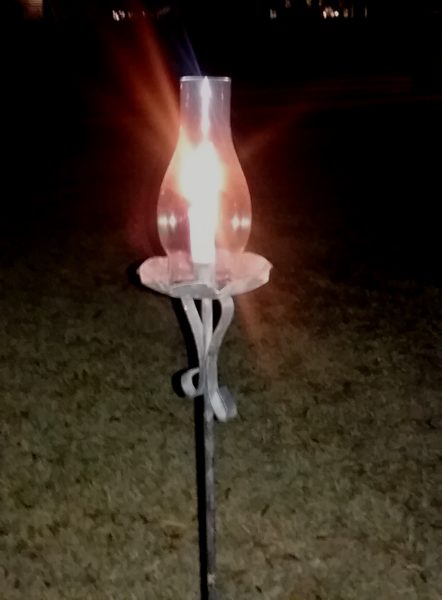
I loved these vintage style outdoor lanterns so much and I wanted to purchase a few for my own yard. After doing an online search and coming up empty I contacted the folks at Tryon Palace. They told me I could purchase them at a local shop for about $35. Hmmm. I would have to drive an hour to get there and at $35 a pop it was not cost effective for me since I wanted a few of them. I started to scour the internet more and came across a fellow blogger who had made her own lanterns that were quite similar and much cheaper to make! You can see Diane Henkler’s version here. I took her design, tweaked it a little bit and made my own outdoor staked vintage style lanterns. Here’s how….
DIY Outdoor Lanterns Simple Craft Project:
You will need One Of Each of The Following Per Lantern:
- Empty Tuna Fish Cans – Standard size. Washed and Paper Free
- Hurricane Glass Chimneys
- 1/2 Inch Set Screw Connectors
- 1/2″ X 5-Foot Conduit Pipes
- Amazing Goop Glue
- Black Spray Paint
- 3/4″ Foam Window Stripping
- Rubber Mallet
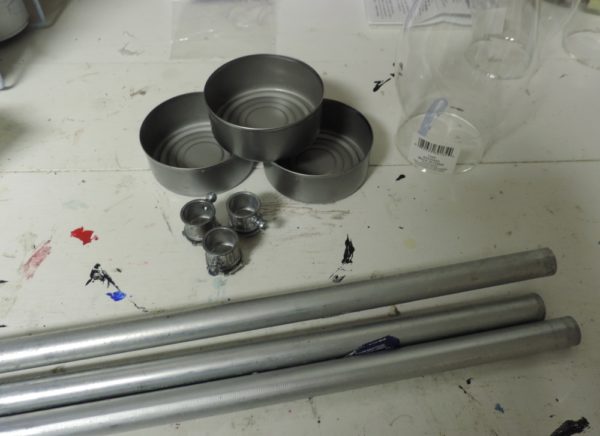
Yes, you read that right. Tuna fish cans! They will be used as the base that will house the candle and hurricane glass chimneys.
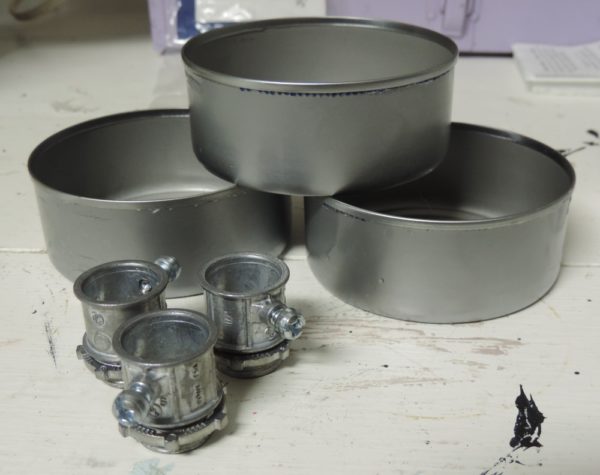
The metal set screw connectors as well as the conduits (I just call them metal pipes) can be found in the building supply section of your local Lowe’s Home Improvement store. I first looked in plumbing but was not impressed with the prices over there. I stumbled upon these babies near the electrical building supplies I believe. Forgive me, it has been a couple of months since I completed this project and my memory is not up to par these days.
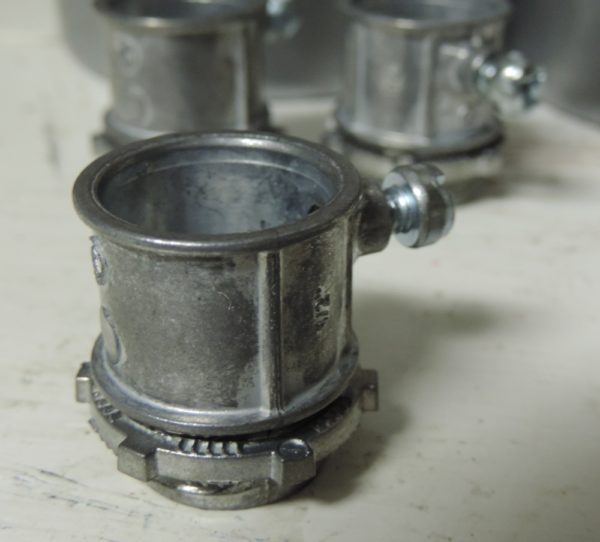
Step 1.
Glue one screw connector, washer side down, to the bottom of each tuna fish can using The Amazing Goop Glue. (This stuff really is amazing!) Try to get it right in the middle. Then let dry overnight.
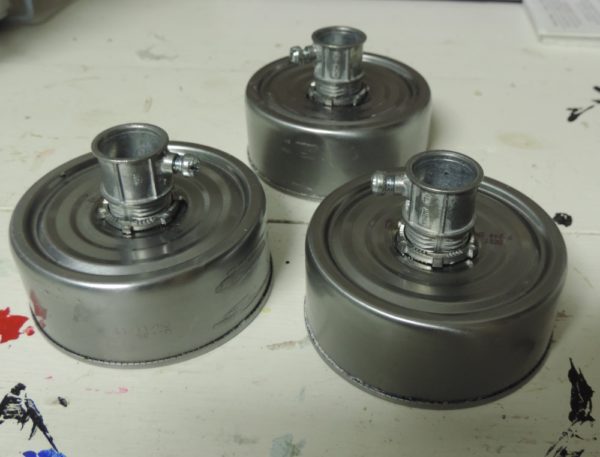
Step 2.
Once dry, take everything but the hurricane glass outside and give them a few coats of black spray paint. Make sure you get the front and back of every piece. I chose Rustoleum’s Stops Rust Semi Glass Protective Enamel to help protect them from the elements.
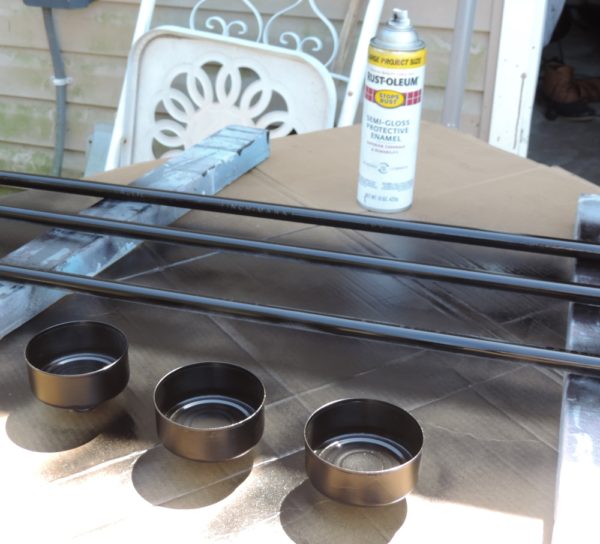
Step 3.
Once everything is dry. Hammer each pipe into the ground with a rubber mallet until it is in there nice and sturdy with no wiggle. Attach your painted tuna fish can base to the pipe/pole and tighten the screw just a bit to secure it.
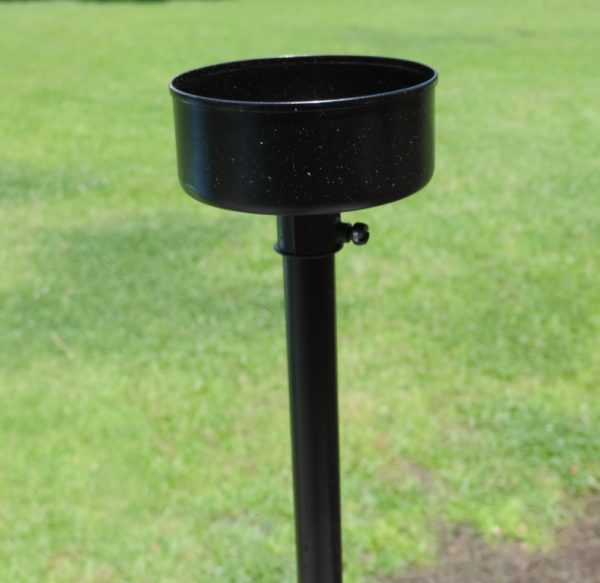
Step 4.
Cut a piece of weather stripping long enough to fit around the bottom of each hurricane chimney. Although it comes with an adhesive side, I chose to add some glue to make sure the weather stripping would stick to the glass really well. The purpose of the weather stripping is to add a little cushion and fill in the gap between the can and glass. Without it I found the glass was a bit wiggly when set in the base by itself and was afraid that a breeze might knock it out. The weather stripping allows that glass to sit in the tuna fish can base nice and snug.
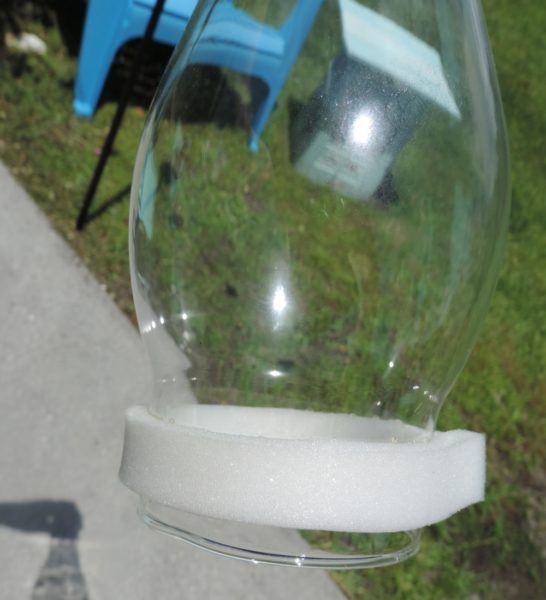
Step 5.
Place a tealight or votive candle into the base of your DIY outdoor lantern, light the candle then place your glass inside the tuna can base.
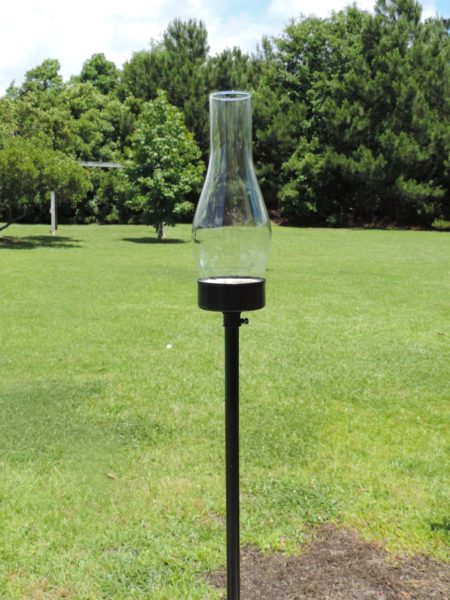
Step 6.
Enjoy your brand new, attractive, UPCYCLED, DIY Vintage Style Outdoor Lanterns!
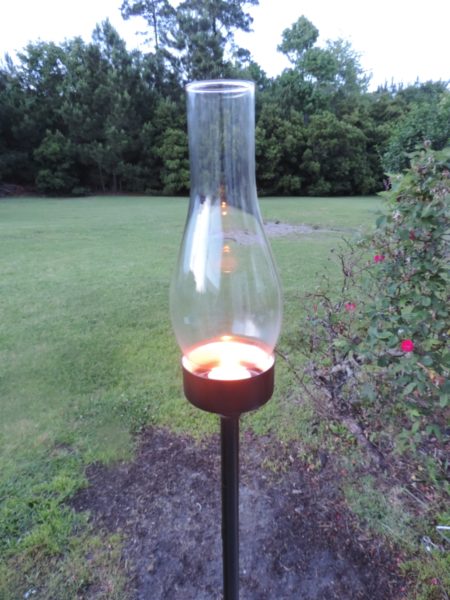
While votive candles would work just fine, I chose to use citronella tealight candles to avoid any waxy buildup. When not in use, you can easy take off the tuna fish can base and glass and store in a safe place.
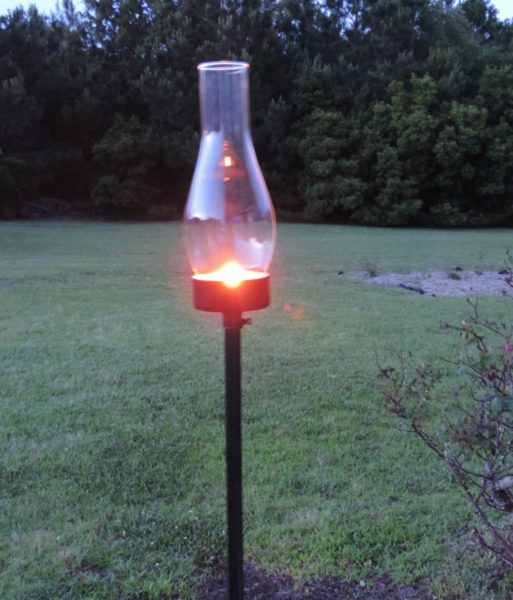
I love how these lanterns turned out. I have them outside by my patio for the summer I think I will be lining my walkway with them on Halloween and Christmas this year.
I made three vintage style outdoor lanterns for about $35. If you are lucky enough to find your glass hurricanes at a local thrift store you can do this cheaper!
More On Tryon Palace
So what exactly is this place called Tryon Palace?
This gorgeous Georgian style mansion was built in what is now New Bern between the years of 1767 and 1770 as the first permanent capital of the Colony of North Carolina. It was the home of Governor Tryon for only one year, until 1771. Through the years it became many things such as a meeting place for the general assembly, a private school and even a boarding house. In the 1950’s Tryon palace was restored to its original glory and was opened for the public to enjoy. Tryon Palace consists of a complex of buildings which include a kitchen, stable, beautiful gardens and more.
I have lived in NC since 1998 and have always wanted to tour Tryon Palace. I cannot believe it took nearly 20 years but this past December I attended their Christmas Candlelight Tour. It was amazing! The entire place was lit up with these beautiful lanterns. Actors dressed in period clothing performed different comedic skits throughout the palace. It was great. When you walked into the main entrance, Governor Tryon and his wife were standing there welcoming us to their Christmas party. My favorite room featured party guests dancing. It reminded me of the mini series Pride and Prejudice with the handsome Colin Firth. (That series was spectacular! If you have not seen it yet you can look it up on Amazon Prime TV. I believe Hulu has it as well.)
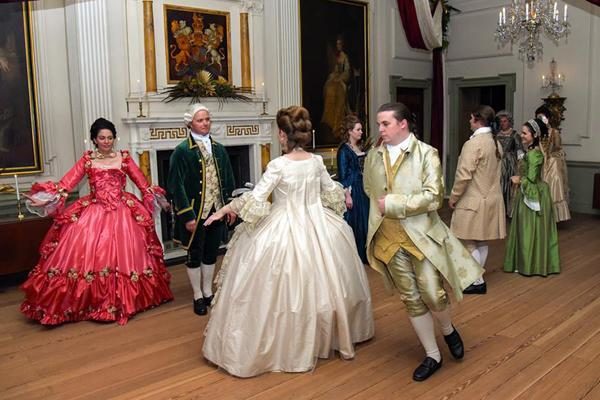
People were on the grounds as well. We watched a blacksmith in action, saw a hysterical acrobat show in a tent, slaves were singing and dancing in the street and a Fife and Drum Marching Corps paraded up and down the front lawn.
I have always had a love affair with the 1700’s, 1800’s and early 1900’s so I was in my element. It was magical. It was like being transported back in time! I love history and regularly immerse myself in period television shows like Downton Abbey (My Favorite) and Victoria. To get a taste of history in the living flesh was superb! I plan on going back in the daytime for another tour very soon. Possibly this fall when the weather cools down a little bit!
I hope you enjoyed this little taste of history and try your hand at making your own homemade Vintage Style Outdoor Lanterns!
Coming Up:
I will be writing a series of posts on Pretty Places to Visit. I am so excited to share with you my recent travel adventure. I was so fortunate to visit a place I have dreamed about for a long time. Sorry, No spoilers! Stay Tuned!!!!!
Thanks so much for visiting!
~Lisa
Sharing Today’s Post at:




Leave a Reply