

Hi All,
I am so excited to share with you a recent craft project that I fell in love with. I wanted to stop in for a few moments to share with you how I created these beautiful Faux Mercury Glass Charger Plates from my post An Elegant Christmas Tablescape .

A couple of weeks ago I read a featured article on Creating Faux Mercury Glass Plates on another blog. She created a wall vignette from a bunch of dollar store plates she created. When I read her tutorial I was inspired to create my own “mercury glass” plates. I thought to myself, “Wow! I would love to get my hands on some charger size plates, they would look great on my holiday dinner table!”
So the search began. I ran to Dollar Tree and was disappointed when they only had small textured dinner plates in stock. I knew I needed at least a 13″ clear glass plate to get the look I wanted. I turned to the internet and did not have much luck. Either they were very expensive or sold in sets of 6. I needed eight! I was about ready to give up when I wandered into my local Walmart to scan their selection of clear dinnerware. That’s when I noticed at the end of the aisle a stack of 13″ Glass Serving Platters at $4.48 a piece! Game on!

You can also buy a set of six platters at Amazon.
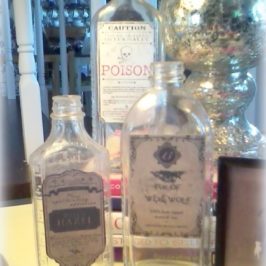
The key ingredient in creating these beautiful plates is a special kind of spray paint called Looking Glass that gives it a shiny, reflective look and with a few tricks you can make the paint mimic the look or mercury glass.
You can actually see yourself in these babies! This paint is awesome!

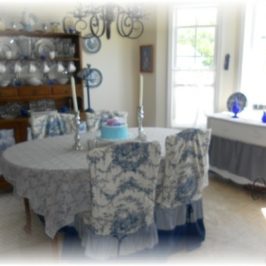
Place your favorite dinner plate on top, add a decorative napkin and you have a beautiful place setting that is elegant and worthy of the fanciest dinner party! My soon-to-be 17 year old son even commented on how nice they look when he wandered down the stairs looking for a snack!

I love how these faux mercury glass charger plates turned out and you can bet they will be on my table for every future holiday and special event.
Printable Instructions:
You can purchase complete printable instructions via download here. Create your own mercury glass charger plates or use this same technique on other projects that scream for an elegant mercury glass look!
Happy Decorating.
~Lisa
Coming Up:
Learn How To Make Quick and Easy Holiday Napkin Rings
Linking Today To:
Wow us Wednesdays, Tablescape Thursdays, On Common Ground, Feathered Nest Fridays, Frugal Friday, The DIY Project Parade


Bonnie
Do you remember the brand name? I couldnt find these on WM's website!
LisasCreativeDesigns
I am not sure they are listed on their website but they are Anchor Hocking Presence 13-Inch Glass Platters. They sell them in store seperately or you can buy a set of 6 on Amazon.com
Charlotte
I purchase these plates/platters to do glass engraving on (special events, weddings, etc.). You can find them at http://www.walmart.com/ip/Anchor-Hocking-12-Charger-Platter/17785557
They are listed as Anchor Hocking 12″ Charger-Platter for $4.46. Specifications:
Model No.: 86478
Shipping Weight (in pounds): 10.67
Product in Inches (L x W x H): 12.88 x 12.88 x 1.38
Walmart No.: 001410207
Best price on these I have found and you can get as many or as few as you want. A set of six (6) would cost $26.75+tax. Even better…get them shipped to your local Wal-Mart and you don’t have shipping costs! 🙂
Lisa Hogan
Thanks Charlotte 🙂
Carolyn
They look so pretty!
Carolyn
Maryann @ Domestically Speaking
I adore Mercury Glass… your faux chargers turned out beautifully. I’m featuring them in the PoPP Spotlight.
Courtney
Such a neat idea~ sharing at the party tonight~ thanks for linking up at Feathered Nest Friday!
Entertaining Women
Great idea and nice tutorial. I was just contemplating painting some plates earlier today. I think that it must be meant to be! Thanks! Cherry Kay
Lisa Hogan
Thanks so much for visiting my blog. Have fun painting your plates! This project was so easy. 🙂
jp
Came across your tutorial via French Country Cottage…Congrats on the feature! I pinned it for you and am following you on FB, now. Hope you’ll stop by my blog and FB page, too!
Lisa Hogan
Thanks so much for visiting my blog. Thanks so much for pinning for me and liking my FB page. I am going to hop on over to your blog right now. 🙂
patty
Thank you for this fabulous tutorial. I have had this paint just waiting to use and I want to do this exactly!
Lisa Hogan
Thanks so much for visiting my blog. Have fun on your project!
LaKeisha Williams
These look great! I’m thinking about taking on this project for my wedding. I wanted to have a mixture of gold and silver. Do you think I can replace the Flat Black Spray Paint with Flat Gold Spray Paint to give it the look I am going for?
Lisa Hogan
Hi LaKeisha,
I think that would look great! You could even maybe mix the gold and black for an old world look. Congrats on your wedding! I’d love to pics of the chargers when you are done!